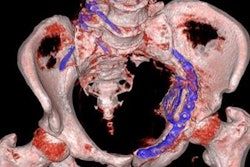
3D printing has skyrocketed in popularity in recent years with the advent of low-cost consumer-grade printers. And 3D printing's growth in healthcare is helping to boost radiology's reputation as an essential service and the first step in creating highly useful models for surgery, implantation, and education.
As radiology begins to expand into the realm of 3D manufacturing, quality control has become essential to ensuring that 3D models are faithful representations of anatomy, according to a recent presentation at RSNA 2016. The complexity of 3D printing demands careful attention to protocols and procedures to provide high-quality models.
 Dr. Anish Ghodadra from the University of Pittsburgh.
In his RSNA talk, Dr. Anish Ghodadra from the University of Pittsburgh presented the quality control system the university uses to maintain high-quality 3D printing every step of the way, from image quality to segmentation to consistent generation of stereolithography (STL) files. Ghodadra is a fifth-year radiology resident and head of the university's 3D printing lab.
"3D printing has grown by leaps and bounds over the last several years, and what we've come to understand is that radiology is essentially moving into the realm of manufacturing," Ghodadra said. "We must establish protocols to ensure repeatable and reliable model production. It's like running a little machine shop. Having spent some time as a device engineer, the one lesson I took away was that it's easy to do something well once. The challenge is doing it consistently."
1. Acquire high-quality images
High-quality 3D printing begins with a consistent process for acquiring high-quality images, he said. You have to carefully monitor every detail, from proper contrast bolus timing to signal-to-noise ratio and resolution. Images must be both diagnostic and segmentable, Ghodadra said.
"A diagnostic study is not necessarily a segmentable study," he said. "What radiologists need to ask themselves at every 3D printing consultation is [whether] the image is of sufficient quality in order to accurately and confidently segment the anatomy."
It requires high resolution, generally slices of 1.25 mm or less, and contrast timed to the target anatomy. Low signal-to-noise ratio produces noisy and inaccurate segmentation. If the 3D model is to be created from a multiphase study, cutting out phases can harm accuracy, Ghodadra said. Kidney imaging might require contrast timed to the anatomy for the arteries, followed by a nephrographic then an excretory phase.
And pick reconstruction techniques wisely.
"If you don't have these things, it really limits what you can do," he said. "As radiologists, we really need to optimize our imaging parameters."
2. Use properly trained segmenters
This complex process begins with trained segmenters -- personnel who are tested before they are allowed to create models for use by patients and doctors, Ghodadra said.
"Segmentation is where you're going to get the highest amount of variability, and where the technologist or resident undergoes standardized training on a standard model before they're allowed to segment real models on their own," he said. "They have to prove they can run through the steps with that model and prove they can create something. We really have to make sure the segmentation is correct, and every single segmentation before printing must be reviewed by a radiologist."
Something as simple as thresholding has pitfalls, he said, mostly involving voxels of image data being incorrectly included or excluded. Organ parenchyma, for example, might be incorrectly connected to a splenic artery.
3. Take care with STL generation
Generating an STL files requires turning the surface voxels into a surface mesh, a process that can be performed by either smoothing or decimation. With the smoothing process, too much can warp or eliminate key anatomy; too little can leave models blocky and noisy, Ghodadra said. Smoothing is nice for creating attractive and realistic models, but it can cut a vessel in half -- or worse -- if overapplied. The same goes for decimation, the process of removing extra triangles, or voxels, from the surface mesh.
"Too much [decimation] will oversimplify the model and remove too much," he said. "But if you don't do enough of it, you're going to end up with mesh error and unprintable regions."
Mesh errors include nonmanifold portions of the model, or holes; self-intersecting model triangles; and triangle orientation errors.
Postprocessing after the STL file is generated requires trimming the model, merging the various parts, and sometimes hollowing models, and mesh repair algorithms on occasion are used, he said. Mesh repair algorithms can significantly alter the shape of the model, delete important structures, and even merge portions together.
"You have to be very careful with mesh repair algorithms," Ghodadra said. "It's very easy to do damage with mesh repair, and we can end up with a tumor sitting on top of the kidney."
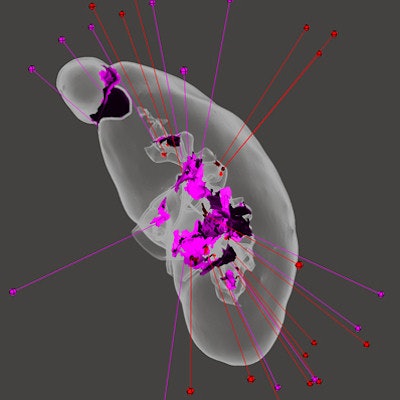
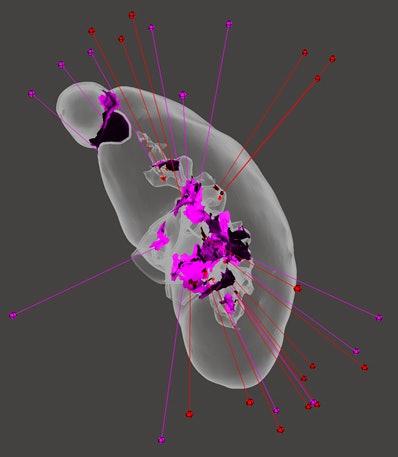 Results of mesh error analysis in a kidney model being prepared for 3D printing show a large error at the intersection of a renal cell carcinoma and the upper pole of the kidney (pink region in top left). Thus, if an automated STL repair algorithm is used to repair this region, the intrarenal portion of the tumor will be erased. To avoid creating a significantly inaccurate model, this section of the model must be manually repaired. Image courtesy of Dr. Anish Ghodadra.
4. Test your printing process
Before you create 3D models with your printer, you'll need to know precisely how the device works, he said. What is the smallest structure it can print, and what's the variability? Here it pays to test the process beforehand, by making models from phantoms that allow a comparison of the phantom to the printed model. Assess the model over time, so as the printer ages and its tolerances degrade, you'll know when it needs to be replaced. Look at the extruder temperature, print speed, filament type and color, resolution, and resin type.
"I'd also recommend the assessment of multiple algorithms, multiple operators, and multiple times, to assess the variability of your process," he said. Print using multiple materials at multiple planes, and measure the variation, so if there's a problem you can figure out the source.
Assess the printed models against standard measurements using high-quality calipers to ensure that the process is repeatable and reliable, Ghodadra said. Scan the printed models to compare the measurements with anatomy. Determine your tolerances: in plane versus z-axis, and determine the smallest feature size.
Last but not least, how old was the resin used to print, and how old was the alcohol used to clean the model?
"At the end of the day, we need to reassure our colleagues of our confidence that the 3D-printed model is a true representation of patient anatomy," Ghodadra said. It's a process that requires high-quality training, high-quality monitoring, and high-quality assessment.


